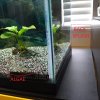
Rack Em Up! Garage tank rack project

FishBeast

Well-Known Member
Hi. My name is Keith, and I am a 'cichlidiot.'*

*Definition below, taken from the introduction to Chapter 5 0f Robert Goldstein's book 'Cichlids of the World,' published by TFH in 1973-

View attachment 7459
Hahaha I’ll show this to my wife if she ever complains about losing car space to tanks (she’s been really supportive so far). I’m only at 50% garage use so far :lol
 

DMD123

Administrator
Staff member
Contributing Member Level III
One coat of paint of the top and edges to seal it, need to flip and sand other side, seal it. Then flip back over to top and do a second, final coat.
IMG_20201231_084325726.jpg
 

DMD123

Administrator
Staff member
Contributing Member Level III
Got the bottom sanded, sealed with black paint and ready to go. Just waiting for it to dry so I can finish the top side. Im at the tail end of my quart of black paint, if I only do the top it will barely be enough. If I need to add anything or touch up, I will need more paint.
 

DMD123

Administrator
Staff member
Contributing Member Level III
Got two coats of paint after the initial seal so it is ready to go. I feel like it needs a couple days of curing before setting up. I also think I should do a “back splash” across the back. It would act as a light block behind the tank and might decrease the little bits of algae growth I get toward the bottom area of the tank. I could also mount my power strip on it. I think I will also work on that little decorative trim on the front. Will cut it out and see if I like the look. Will post pics of the idea later.
 

DMD123

Administrator
Staff member
Contributing Member Level III
Here is my back splash idea. Thinking it would help with the algae growth I get in the lower spots of the front corner.
IMG_20210101_104527978.jpg
 

DMD123

Administrator
Staff member
Contributing Member Level III
Got my back splash cut out of some scrap trim in the shed.
IMG_20210101_111054580.jpg
It should work well to block out the light
IMG_20210101_111845098.jpg
That looks amazing! Your jigsaw skill (if that’s what you used) is impressive.

Jigsaw work in action for the front trim. Have to have a good jigsaw and sharp blade.
IMG_20210101_113617760.jpg

A little round over with the router
IMG_20210101_115558426.jpg

This is the idea for the trim under the tank
IMG_20210101_114132646.jpg

How it should look with backsplash and trim in front. Of course everything will get coated with the black exterior grade paint. Then screwed together and installed.
IMG_20210101_114237724.jpg

Painted the pieces. Ran out of paint. I could let it be but I really need at least a second coat so I have to buy another quart.
IMG_20210101_122328817.jpg
Almost there.... so close
 
Last edited:

DMD123

Administrator
Staff member
Contributing Member Level III
I guess I could install the background on the tank while Im waiting on painted surfaces to dry.

I am waiting on a new heater to come in also. I decided I wanted to do another Aquarium Masters Digital heater so got one from Ken's coming in.

I have been thinking long and hard about keeping the 30 gallon but dropping the bottom shelf to accommodate the tank with room for maintenance would take away a ton of storage space. I could still do it but dont want to lose the space. The middle shelf would be at the same height as the shelves for the 65B's.

Quick Paint app work to see lost storage
Redo tanks.jpeg
 

sir_keith

Legendary Member
Contributing Member Level III
...I have been thinking long and hard about keeping the 30 gallon but dropping the bottom shelf to accommodate the tank with room for maintenance would take away a ton of storage space. I could still do it but don't want to lose the space...

Aw, c'mon; I'm sure there's extra storage space somewhere in your wife's closet... :cool:
 

DMD123

Administrator
Staff member
Contributing Member Level III
Aw, c'mon; I'm sure there's extra storage space somewhere in your wife's closet... :cool:
lol, when we did our remodel the house was already getting planned around the 300 gallon in the living room with no plans of any additional tanks... she has been very patient with me
 

DMD123

Administrator
Staff member
Contributing Member Level III
Hard to tell but this lower edge trim should give a very finished look when its all in place
IMG_20210101_162719972.jpg

The front trim and backsplash were attached and just enough paint to barely cover it all
IMG_20210101_162732092.jpg
I want to get it set up but the paint is a bit soft still and I have no touch up paint.
 

DMD123

Administrator
Staff member
Contributing Member Level III
Just waiting for paint to cure a bit before setting up. Also waiting on new heater to come in. Still need a tank background installed, cut out plastic strip on lid for filter and then set it up. Feel sorry for the puffer having to get moved around, but his home will be bigger and if goes as planned, this one will be live plants.
 

DMD123

Administrator
Staff member
Contributing Member Level III
Progress!

Top cut out for filter
IMG_20210106_102400719.jpg
Tank in place
IMG_20210106_111741264.jpg
Looks better scaled for the spot
IMG_20210106_111748437.jpg
Filing it right now....
 

DMD123

Administrator
Staff member
Contributing Member Level III
Trying to show the pop out
IMG_20210106_120449964.jpg
IMG_20210106_120512741.jpg
The fishroom with new tank
IMG_20210106_120545058.jpg
 

DMD123

Administrator
Staff member
Contributing Member Level III
The ever progressing tank rack. Today added the 30 gallon below the 46g bowfront
IMG_20210220_094054869.jpg
IMG_20210220_094043992.jpg
I lost some storage but will utilize under the tank space with a under bed type box so not too much lost
 

DMD123

Administrator
Staff member
Contributing Member Level III
Im thinking of suspending the lights from the underside of the racks for the bottom tanks. I think it would make maintenance easier not have the light fixture in the way, specifically when I have to pull out a HOB filter to clean. I might do that with the center 30 gallon first and see what I think of it.
 
Top